在 WebGL中,场景图(Scene Graph)是一种用于组织和管理 3D 场景中对象层次结构的结构。这种结构通常以树形结构的形式表示,其中每个节点代表一个对象或一组对象,并且这些节点可以有子节点。场景图有助于简化变换、渲染和其他与场景管理相关的操作。
# 1.场景图的基本概念
- 节点(Node):场景图中的每个节点代表一个对象或一组对象。节点可以包含几何数据、材质、变换信息(如平移、旋转、缩放)等。
- 层次结构(Hierarchy):节点可以有子节点,形成树形结构。子节点继承其父节点的变换,从而实现层次化的变换管理。
- 变换(Transform):每个节点都有自己的变换信息,这些变换信息影响节点及其所有子节点的位置、方向和大小。
- 遍历(Traversal):渲染时,通常会从根节点开始遍历整个场景图,应用变换并渲染每个节点。
# 2.场景图中常用的两个矩阵
- localMatrix: 当前节点的局部矩阵。它会在局部空间的原点对自己和子节点进行转换操作。
- worldMatrix: 当前节点的世界矩阵。它会在全局空间的原点对自己和子节点进行转换操作。将当前结点的局部空间的变换转换到场景图根节点所在的空间。
通常会定义一个Node类,用于管理节点。
class Node {
    constructor() {
        this.children = [];
        this.localMatrix = m4.identity();
        this.worldMatrix = m4.identity();
    }

    setParent(parent) {
        // 从父节点中移除
        if (this.parent) {
            const index = this.parent.children.indexOf(this);
            if (index >= 0) {
                this.parent.children.splice(index, 1);
            }
        }
        // 添加到新的父节点上
        if (parent) {
            parent.children.push(this);
        }
        this.parent = parent;
    }

    updateWorldMatrix(parentWorldMatrix) {
        if (parentWorldMatrix) {
            // 传入一个矩阵计算出世界矩阵并存入 `this.worldMatrix`
            m4.multiply(parentWorldMatrix, this.localMatrix, this.worldMatrix);
        } else {
            // 没有矩阵传入,直接将局部矩阵拷贝到世界矩阵
            m4.copy(this.localMatrix, this.worldMatrix);
        }
        // 计算所有的子节点
        const worldMatrix = this.worldMatrix;
        this.children.forEach((child) => {
            child.updateWorldMatrix(worldMatrix);
        });
    }
}
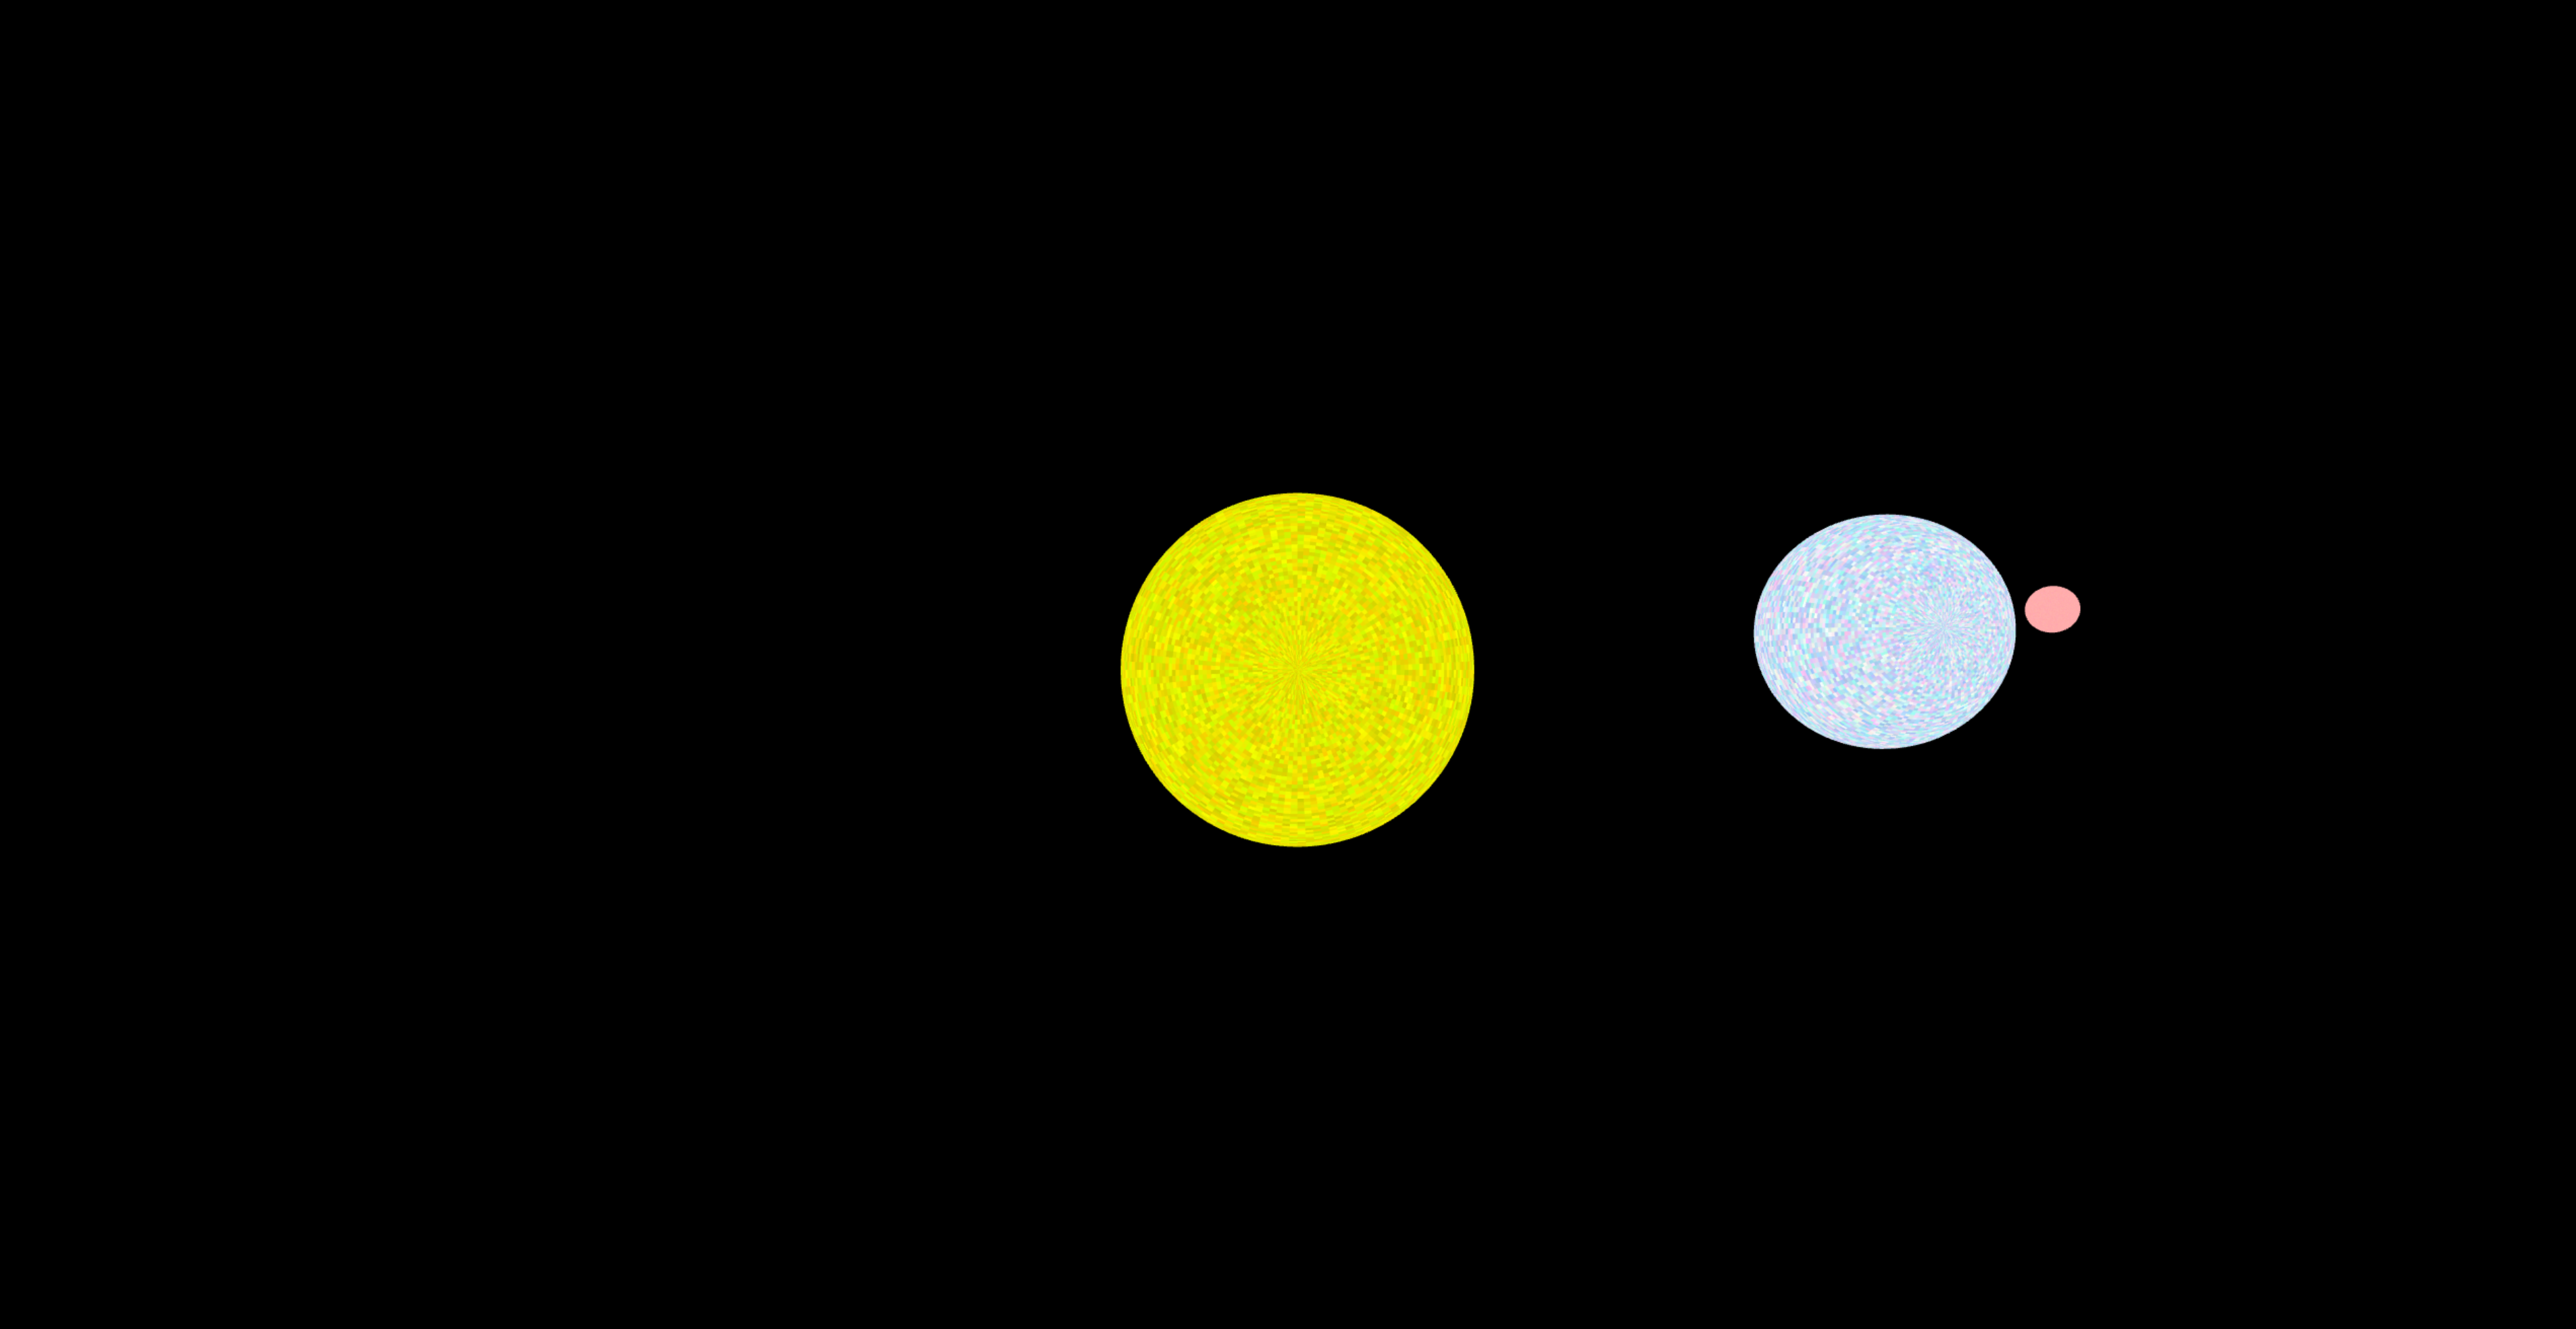
下面我们使用一个太阳系的旋转例子来展示场景图。下面的例子中,太阳、地球和月球都是节点。
# 3.场景图的实践
# 1.定义所有的节点
添加太阳系和地球轨道和月亮轨道节点的原因是为了在缩放太阳,地球时不会影响到子节点。
节点图如下所示:
 solarSystem
   |    |
   |   sun
   |
 earthOrbit
   |    |
   |  earth
   |
  moonOrbit
        |
       moon
//太阳系
const solarSystemNode = new Node();
//地球轨道
const earthOrbitNode = new Node();
earthOrbitNode.localMatrix = m4.translation(100, 0, 0);  // 地球轨道离太阳 100 个单位距离
//月球轨道
const moonOrbitNode = new Node();
moonOrbitNode.localMatrix = m4.translation(20, 0, 0);  // 月球离地球 20 个单位距离
//太阳
const sunNode = new Node();
sunNode.localMatrix = m4.scaling(5, 5, 5);
sunNode.drawInfo = {
  uniforms: {
    u_colorOffset: [0.6, 0.6, 0, 1], // 黄色
    u_colorMult:   [0.4, 0.4, 0, 1],
  },
  programInfo: programInfo,
  bufferInfo: sphereBufferInfo,
};
//地球
const earthNode = new Node();
earthNode.localMatrix = m4.scaling(2, 2, 2);   // 让地球变为两倍大小
earthNode.drawInfo = {
  uniforms: {
    u_colorOffset: [0.2, 0.5, 0.8, 1],  // 蓝绿色
    u_colorMult:   [0.8, 0.5, 0.2, 1],
  },
  programInfo: programInfo,
  bufferInfo: sphereBufferInfo,
};
//月球
const moonNode = new Node();
moonNode.localMatrix = m4.scaling(0.4, 0.4, 0.4);  // 月亮离地球 20 个单位距离
moonNode.drawInfo = {
  uniforms: {
    u_colorOffset: [0.6, 0.6, 0.6, 1],  // 灰色
    u_colorMult:   [0.1, 0.1, 0.1, 1],
  },
  programInfo: programInfo,
  bufferInfo: sphereBufferInfo,
};
# 2.设置父子节点
sunNode.setParent(solarSystemNode);
earthOrbitNode.setParent(solarSystemNode);
earthNode.setParent(earthOrbitNode);
moonOrbitNode.setParent(earthOrbitNode);
moonNode.setParent(moonOrbitNode);
# 3.更新矩阵
// 更新每个物体的局部矩阵
m4.multiply(m4.yRotation(0.01), earthOrbitNode.localMatrix, earthOrbitNode.localMatrix);
m4.multiply(m4.yRotation(0.01), moonOrbitNode.localMatrix, moonOrbitNode.localMatrix);
// 旋转地球
m4.multiply(m4.yRotation(0.02), earthNode.localMatrix, earthNode.localMatrix);
// 旋转月亮
m4.multiply(m4.yRotation(-0.01), moonNode.localMatrix, moonNode.localMatrix);

// 更新场景图中所有节点的世界矩阵
solarSystemNode.updateWorldMatrix();

// 更新所有物体的渲染矩阵
objects.forEach(function (object) {
    // 更新所有物体的渲染矩阵
    object.drawInfo.uniforms.u_matrix = m4.multiply(viewProjectionMatrix, object.worldMatrix);
});
# 4.绘制模型
绘制模型时,我们做了以下两点优化
- 如果将要绘制的对象和前一个对象使用相同的程序, 则不需要调用
gl.useProgram - 绘制的形状/几何体/顶点 是之前绘制过的,相同的参数就不必再设置一遍
let lastUsedProgramInfo = null;
let lastUsedBufferInfo = null;
// 渲染物体
objectsToDraw.forEach(function (object) {
    const {programInfo,bufferInfo} = object;
    let bindBuffers = false;
    // 优化点1
    if (programInfo !== lastUsedProgramInfo) {
        lastUsedProgramInfo = programInfo;
        // 由于我们只有一个程序,所以我们只需要调用一次 gl.useProgram就行了
        gl.useProgram(programInfo.program);

        // 更换程序后要重新绑定缓冲,因为只需要绑定程序要用的缓冲。
        // 如果两个程序使用相同的bufferInfo但是第一个只用位置数据,
        // 当我们从第一个程序切换到第二个时,有些属性就不存在
        bindBuffers = true;
    }
    // 设置所需的属性 优化点2
    if (bindBuffers || bufferInfo !== lastUsedBufferInfo) {
        lastUsedBufferInfo = bufferInfo;
        webglUtils.setBuffersAndAttributes(gl, programInfo, bufferInfo);
    }

    // 设置全局变量
    webglUtils.setUniforms(programInfo, object.uniforms);

    // 绘制
    gl.drawArrays(gl.TRIANGLES, 0, bufferInfo.numElements);
});
总结:
earthOrbitNode地球轨道节点的局部空间的原点位于太阳系节点,坐标是(0,0,0)。moonOrbitNode月球轨道节点的局部空间的原点位于地球轨道节点,坐标都是(100,0,0)。
demo地址 太阳系场景图 (opens new window)
# 4.拆分localMatrix
为了解决在计算 localMatrix可能出现的问题(对矩阵缩放到0再恢复),我们需要对Node类加强一下。
通过定义一个TRS类,来管理localMatrix。
将平移、旋转和缩放操作分别处理,并且在每次需要时生成最终的变换矩阵,而不是不断累积,这避免了数值误差的累积,使得变换结果更加准确。
class TRS  {
    constructor() {
        this.translation = [0, 0, 0];
        this.rotation = [0, 0, 0];
        this.scale = [1, 1, 1];
    }
    getMatrix(dst){
        dst = dst || new Float32Array(16);
        const t = this.translation;
        const r = this.rotation;
        const s = this.scale;

        // 通过平移,旋转和缩放计算矩阵
        m4.translation(t[0], t[1], t[2], dst);
        matrixMultiply(m4.xRotation(r[0]), dst, dst);
        matrixMultiply(m4.yRotation(r[1]), dst, dst);
        matrixMultiply(m4.zRotation(r[2]), dst, dst);
        matrixMultiply(m4.scaling(s[0], s[1], s[2]), dst, dst);
        return dst;
    }
};
Node类中添加TRS实例,将localMatrix拆分为translation,rotation和scale。
class Node {
    constructor(source) {
        this.children = [];
        this.localMatrix = m4.identity();
        this.worldMatrix = m4.identity();
        this.source = source;
    }
    updateWorldMatrix(matrix){
        //如果 source 存在就从它那里获取局部矩阵,避免在运算过程中因为localMatrix 不断累积错误
        const source = this.source;
        if (source) {
            source.getMatrix(this.localMatrix);
        }
        ...
    }

}
最终的实际效果如下所示:
重写的demo地址 太阳系场景图-使用TRS (opens new window)
参考文档
WebGL 绘制多个物体 (opens new window)
WebGL - 场景图 (opens new window)
阅读量: